The Coolest Hockey Bedroom EVER is a series of posts chronicling the transformation from a boring bedroom to a hockey heaven for my toddler son. You can read about his dresser here. Have an idea for the room? Comment below.
Today’s installment of ‘I have too much time on my hands’ ‘The Coolest Hockey Bedroom EVER’ will cover the creation of a pint-sized hockey locker. Sure, you can buy these retail, but what fun is that? Rinkbuilders need SOMETHING to screw together haphazardly in the warm summer months, so why not address some storage/room awesomeness issues at the same time?
1 – The material list is pretty simplistic. It assumes that you already own things like a drill, screwdrivers, a table saw, and wood glue.
-Particleboard ($20, but see my note below)
-Hooks ($5)
-1″ Screws ($3)
-Paint (Free – used leftover indoor paint)
-Name Tag ($20 shipped)
What I’d do differently: I’d upgrade the wood I used. Wood can get a little spendy for some of the higher-end types, and my goal was to keep this project’s costs low. But I could have used an entry-level pine and still come out under $50, and the end result would have been much higher quality. Plus the particleboard can break and fall apart if your screws are too large.
2 – You’ll want to measure the area where you intend to place this locker, which will help you determine the dimensions of your particleboard. I had a little nook in a corner of my son’s room that would allow for a 1′ square locker footprint. The particleboard I purchased was 6’x1′, and I completed this entire project using four pieces.
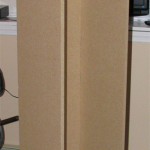
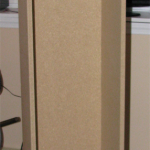
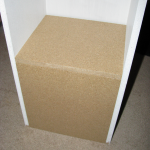
You’ll build the body of the locker by simply gluing and screwing three full pieces of the 6’x1′ particleboard together. Run a thin bead of wood glue along the joint before joining the pieces, and be sure to drill pilot holes before screwing them together to keep your wood from splitting.
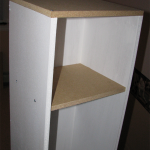
3 – Once you have your frame built and looking like the images above, you can measure out your shelving/seating setup. I did this by taking my extra fourth piece of particleboard and having it cut into four pieces: the top piece, the shelf, the seat, and the front facade along the floor.
What I’d do differently: I’d paint my pieces immediately after cutting, rather than waiting until the whole unit was assembled. It’s much easier to paint the wood pieces when they’re not assembled, as this allows you to work with different colors without having to worry about masking anything or painting in tight spots. My advice is to paint your pieces during step three.
4 – Put it all together. After making sure everything was square, I screwed the top piece on. I then slipped the shelf in, leveled it, drilled four pilot holes, and made it permanent with four screws.
For the seat, I first added the front facade, as that piece not only serves as the bottom front of the unit, but it also acts as the support for the front of the seat. I then took a scrap piece of 1″x2″ of pine, leveled it, and screwed it to the back wall of the locker to support the rear of the seat. Be sure this piece of 1″x2″ is at the same height as the top of your front facade. From there, it’s easy to slide your seating surface in, securing with wood glue and a few more screws.
What I’d do differently:Â I had initially intended to create a hinged seat (allowing for a ‘cubby’ of sorts underneath), but didn’t have the time or extra material to screw it up. If you choose to go this route, you’ll have to add some seat supports along the side so that the hinge doesn’t get bent the wrong way when your toddler leaps inside of it (and they will) The hinges were about $4.
5 – Now for the finishing touches. By far my favorite feature and what makes this thing really rad is the nametag. After doing a bit of googling one night, I ordered my son’s tag from www.nametagcountry.com. There are surely other sources, but many of the sites I found had volume minimums or higher prices. Once on the site, go to Products > Door Signs > Door Signs and select ‘Black Door Signs’. This provides you with a whole host of color combinations. We went with the Canary Yellow plate with black Arial text. It rules.
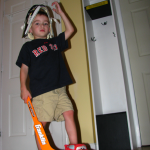
And what’s a locker if you can’t hang stuff in it? I opted to use three hooks in my son’s locker. The one in the back is a bit higher than the other two, which are placed lower because he’s only three and I wanted him to be able to reach them easily.
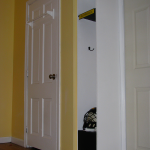
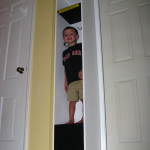
And there you have it! Aside from painting, it probably took me a grand total of two hours to build. My son went absolutely bananas when he came home from school the next day, which was precisely the point.
At the old house, we used to play mini hockey in the living room, where the couch was the bench, the loveseat was the penalty box, and the hardwood was the ice. Now we’ve added a new dimension to our indoor play: after each “buzzer”, we retreat to his bedroom where he sits in his locker, takes off his “skates”, and relaxes for 30 seconds before jumping up and repeating the whole scene. $50 and two hours of work to let my little winger pretend he’s chilling between periods of a close playoff game? Worth it and then some.
Want more Backyard-Hockey.com content? Please consider joining our mailing list, adding our RSS feed, liking us on Facebook, or following us on Twitter!



i want to make one of those!!