The term “tools of ignorance” is generally applied to the equipment that baseball catchers wear. Coined by Muddy Ruel, a major-league catcher in the 1920’s, it loosely implies that smart folks would never don such gear and play such a dangerous position unless they were ignorant. When we think about rinkbuilding, ignorance acts as both a fuel and an excuse, and as such, we have our own tools of ignorance.Â
I thought I’d run through a quick list of tools I use when I’m working on the rink, as well as some other pieces of equipment that I’ve heard good things about. This is not the be-all, end-all of rink tool kits. As I’ve said before in this space, there is no right way to do anything when it comes to backyard ice. It is all personal preference, and with each passing year, you’ll find yourself developing your own routine and rituals. This post is just what I’ve been using when I trudge out into the cold of night.Â
The Basics
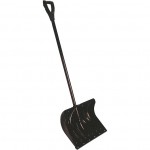 The first thing that I hear when I talk to folks about rinkbuilding is how much work must go into it. And most winters, perhaps the most frequent task will be clearing fresh powder off the ice. Obviously, the most common way to do this is by using your standard snow shovel. There are literally hundreds of styles, made of any number of materials, and they all work. Essentially, you can be sure of only a few things if you’re setting out to build a rink, and one of them is that it will snow several times each winter. You’d better have at least one way of getting it off. (Note: Not satisfied with the generic shovels at your local store? Check out the 48″-wide SnowPusherLite. It has a metal edge and a rubber squeegee edge, and its sheer width would probably cut your shovel time by 75%. It’s on my 2010 Christmas list.)
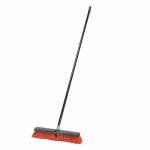
Another common rink tool is the standard outdoor push broom. This is particularly helpful for cleaning off the last bits of snow before you resurface. Most shovels won’t scrape the snow off down to the ice, and you never want to resurface with fresh water on top of snow (since slush is evil). So giving your rink a once-over with a push broom will give you an ideal surface on top of which you can layer on the new ice. Need more proof that a broom is a requirement for making smooth ice? Even these guys are outfitted with them.
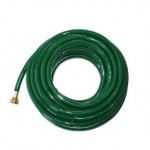 The last item that I would qualify as a “must have” is a garden hose. Like all of the other tools I list here, there are an infinite number of lengths, materials, and manufacturers, and they’ll all work. However, I will caution you that when it comes to hoses, you do seem to get what you pay for. I went cheap early on, and used a narrow no-name brand from a big box retailer. That house routinely kinked, got very stiff when cold, wouldn’t spool well afterwards, and generally increased my resurface time. I upgraded to a no-kink hose towards the end of last year and the results are noticable. I no longer have to worry about kinks stopping the water flow, and resurfacing has been cut significantly as a result. If money is no object, then by all means, go big. And please…when you’re done resurfacing, store the hose somewhere warm.
The Next Level
If you find yoursel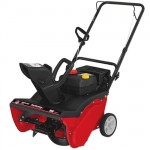 f serious about your backyard rink, and you think it’s something you’d like to make an annual tradition, there are some tools that will help make your maintenance easier and your ice better. I received this little number for Christmas last year, and suffice it to say, Santa is THE MAN. The Yard Machines 31AM2N1B700 is smaller and lighter than a standard two-stage snowblower, and with a 10″ high opening, I can carry it down to the rink, lift it over the boards with ease by myself, and clear the snow from all but the biggest snowstorms. It doesn’t require a gas/oil mix, and while my model doesn’t have the push-button start like the one I linked, it started up on the second or third pull this winter after sitting idle for the previous nine months. I believe most of the major manufacturers offer a product like this one, and so long as you can clear the purchase by The Rink Boss (“Honey, it means more time with you and the kids!”), then you need to get one.
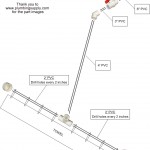 No backyard rink tool conversation is complete without at least a passing mention of the Homeboni (or Rink Rake). As described here, there is no right or wrong way to build one. But making quality ice in short order is made infinitely easier the second you start using a Homeboni. Many people take it a step further and connect it to an outdoor hot water spigot, something I envy and will hopefully do in my next house. Using hot water piped through a homeboni is probably the closest way to get the glass-like ice surface you normally only see indoors. And again, if money isn’t a deterrant for you, google around for some…pretty…cool…setups.
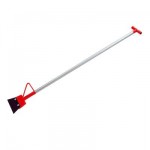 Speaking of that glass-like surface, it can be hard to replicate without some of that cliche-ridden elbow grease. That’s because water freezes at different rates depending on a bunch of factors that I don’t yet understand, and you’re likely to experience your fair share of bumps, ridges, divots, and plateaus. Most of these can be eliminated with a simple and inexpensive tool found at most flooring and home improvement stores. You’ll find it in the flooring section of the big stores, because its original purpose is to scrape up old flooring. But rinkbuilders, clever owing mostly to necessity, have adopted this tool as the ideal method for smoothing out rough patches in the ice. Be prepared to sweat a bit if you go this route, as these things are purposefully heavy, made to use the inertia of the heavy blade to blast through sticky flooring adhesive (and rogue chunks of ice). But when it comes to having smooth, fast ice, the hard work is more than worth it.Â
Budget? What budget?
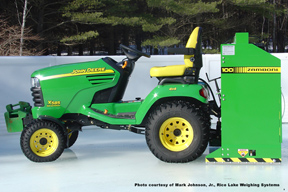 This piece will make you the envy of your friends, the entire Backyard Rink mailing list, and pretty much anyone who doesn’t have the initials “FZ“. It’s the official Zamboni Model 100, which attaches to the back of specific John Deere lawn tractors and was made to handle rinks between 1,000 and 3,000 square feet, all for the paltry sum of $10,000. Hrm…35×50 is 1,750 square feet…and I do have a John Deere…bah, nevermind. Maybe once I’m done paying for daycare. Anyways, this amazing little beast is probably the coolest piece of equipment I’ve ever seen, and by all means, if you (or someone you know) owns one, I’d love to hear about it. In that same breath, if anyone in the southern NH area would like to go halfsies…
~~~
So there are the basic (and not-so-basic) tools that can help you craft the backyard rink of your dreams. Did I miss anything? Do you use anything strange or have you built a tool yourself? Post about it in the comments.


Excellent description of the things we keep inside our toolchest that make our job a little easier. A couple of things that I use in addition to the ones you describe are:
Rubber Squeegee. After the ice is well used and before I am ready to resurface, I use a squeegee (always quicker when on skates) to push the ice shavings to one side of the rink. It works better than any shovel I have at giving the surface a close shave. I then scoop the pile of shavings off with a shovel.
Quick Connect – Hooking the hose up to outside hot water faucet is never fun in the cold. A quick connect attachment on either end of it allows the hose and attachments to hook and unhook in seconds. It’s a lot easier than lining up the threads and twisting until the connections are snug.
Neoprene (rubber) Gloves – No matter how careful I am when resurfacing, water seems to wind up soaking my gloves. All it takes is a few drops to make your gloves frozen, and that sucks the fun out of making your ice sheet smooth again. So, I use bright orange rubber gloves to keep my hands from getting wet. They are not lined so I use a big pair and then slip a pair of soft work gloves inside for added protection from the cold.
Great summary, Joe!
Scott
Thanks Scott, great additions! I forgot about the squeegee, as we’ve had this discussion before. I remember desperately wanting one when I went toe-to-toe with a rink full of slush earlier this month. And I had never thought about a quick-connect at the spigot. I use one to connect my two hoses together, I’m embarrassed that I hadn’t even thought of using them elsewhere.
As for the gloves, I can attest to the requirement of waterproof gloves. After struggling through last season with some old garbage ski gloves, my lovely wife green lighted the purchase of these beauties back in December. They’re the best gloves I’ve ever owned. About a half hour ago I was taking snow, packing it down into some pock-marks in the ice, dumping cups of water on the snow, and mashing down the resulting slush to fill the hole. Hands were warm and dry. Can’t say enough about ’em!
All of these items will make a “Part Two” of this post if I ever get around to writing one.
I appreciate the additions. Happy skating!
Great site. Thanks for the detailed break down on supplies. I appreciate the photos. You’re speaking my language. I will recommend backyard-hockey.com to others. This is my first winter building a rink. I’ll be back for more insight, and to get the how-to directions to build my own homeboni when the time comes.
Thanks for the hard work on the site. Let your wife know that all your hard work helping other “backyard rinkers” should be rewarded with the green light to upgrade to the John Deer Zamboni attachment. Think of all the children you’ve made very happy. That’s a legacy worth rewarding.
This site will help alot of first timers. Thanks again.
Dave
Great stuff, Thanks for all the tips. First year with a rink! Just ordered the 48″ shovel, also have a resurfacer from nicerink, let ya know how it works. Rink getting flooded today, very excited we have a 24×48 rink, should be fun!